JUNE 6 EXIT SURVEY
CLICK THE LINK TO TAKE YOUR EXIT SURVEY
May 31 fox 47 news: yes! pics opportunity
There is a nightly segment on FOX 47 News called Yes! Pics. In this segment, viewers can send in pictures (3 per night) that will be on our program. Also needed:
1) First name of Student
2) Context to the picture or short description that the anchor can use in sharing the image.
3) Mrs. Kubu's Fun with Photography Class
If this sounds like something you would be interested in use the website https://wetransfer.com/ to send in images. Email to:
[email protected]
[email protected]
may 28 Final Project: creative creature
1. Choose a Creative Creature from Mrs. Herek's students to recreate using Photoshop. Shoot a photo of it to use as a reference and to use for your project.
2. Use your own photos or use Creative Commons to find one that will work to create textures, body parts, etc. DO NOT PLAGIARIZE!
3. Compile your texture photos using Photoshop into the shape of the animal. Pay attention to detail. Pay attention to notes that the elementary student made.
4. Choose a background where you think this creature would like to live. A habitat. Incorporate this in your project.
5. Name your creature if it doesn't already have a name. Type the name using Photoshop in an empty space.
6. Make sure your design is 8"x10" and 300 pixels/inch.
7. Save as your last name and Creative Creature Collaboration and make sure it's a jpeg.
8. Email it to me to print in color. We'll send your creatures back to Mrs. Herek's class.
9. Upload your image to your blog and title the post Creative Creature Collaboration.
*This project is due no later than the end of your exam period. It will not be accepted after your exam.
may 23 surrealism project
*Reminder: Publish your Levitation Project by end of class today!
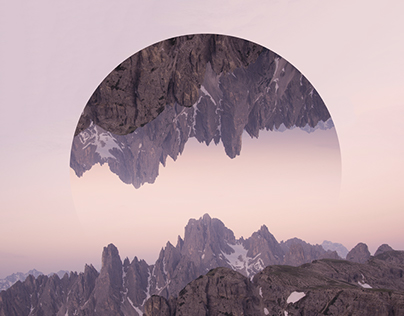
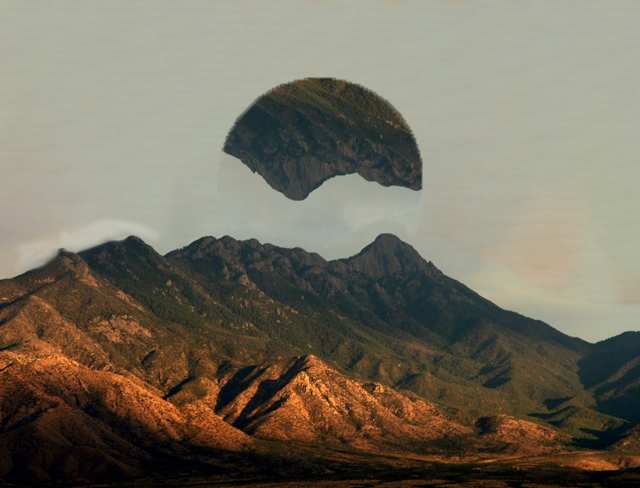
For your surrealism project, you will be combining photos you have taken with your knowledge of Photoshop in order to create a surreal image. Surrealist art expresses a realistic looking, but dream-like state, beyond rational control. So, what you are seeing looks real, but could never happen in the world as we know it. Here's a website with some great Surrealist Photography examples and a famous Surrealist photographer Jerry Uelsmann with which you should familiarize yourself.
You need to use at least 3 of your own photos. You are not limited to the photos you have taken for this class. You may choose other photos you have taken previously or shoot more photos. But, they must be your very own photos!
You need to use various tools to blend the photos into one realistic, dream-like image. The final image shouldn't have grain or pixels. You may google tutorials to research other Photoshop techniques to get your desired effect.
Title a new post Surrealism Project.
Upload your 3 original photos and then your final project.
Title your final project.
Publish your post. Your surreal photo is due end of class Wednesday May 29th.
may 22 levitation project continued
1. Edit your levitation photo so it looks like your partner is really floating. Think about shadows, pay attention to small detail and have fun!
2. Save your photo as a jpg and upload it to your blog.
3. Title your photograph and publish it.
*Make sure your Famous Photographer and Photo Remake post is up to date with the original famous photo, your unedited photo and your edited final photo. Also, make sure you have your list of 10 similarities. Publish your updated post!
may 20 levitation project
Seniors-this is your last project! Congratulations!
Underclassman-You'll have one more Final Project after this.
You're goal is to create a scene that makes it look as if your partner is levitating/floating/flying, etc. Think Mary Poppins flying with her umbrella, think fairies fluttering around with wings, think David Blaine who magically levitates, etc.
Consider your background. Consider lighting. Consider positioning of the person's body.
There are many resources on how to create this image. Feel free to google them to help you decide what to do.
Here's Audrey Braman's blog to use as a reference tool as well:
https://audreybraman1.blogspot.com/2019/04/levitation-project.html
1. Today, start a new blog post. Title it Levitation.
2. Choose a partner.
3. Do some research on how to create levitation type images.
4. Create your plan. Where will you shoot your photos? How will the person be positioned? What will they be wearing? Etc.
5. Be ready to shoot these photos tomorrow. I'll have stools for you to use.
may 17 congrats to our photo remake winners!
Seth Stone, Ava jaschke, anna krumm, Karley Janecke, Max Eyster, and Heidi Scott


may 15 presenting your famous photographer and photo remake
1. 10 presentations per day. Volunteers first, then random order
2. Stay 1 minute after bell for every reminder I have to give about paying attention and being respectful (phones, sleep, talking, homework, other).
3. Take notes on presentations using handout and rate similarities.
4. Clap at end of presentation.
Notes: 30 points
Presenting your project: 70 points
Slides: 50 points
Photo Remake: 100 points
*Each day your presentation is late will result in 10% off your final grade.
may 14 edit your photo remake
You have had 2 and a half weeks to shoot your photo remake. Your goal for today and Tuesday is to edit your photo remake using Photoshop to get it as close to the original photo as possible.
1. Before you edit it, upload your unedited photo remake to your Famous Photographer post and label it Unedited.
2. Use your Photoshop knowledge to try various effects to get your photo remake closer to the original. When finished, upload the new edited version of your photo to your Famous Photographer post and label it Edited. Then, list 10 similarities between the original famous photo and your edited photo remake. Be sure to publish your post!
3. Update your slide presentation with your Unedited and Edited photos.
4. Finally, list the 10 similarities between the original famous photo and your edited photo remake.
And, double check that you are ready to present! If so, email/share your presentation with me! We'll start presentations on Wednesday.
may 13 photoshop day 5: merging 2 photos
*Reminder: Shoot your photo remake! We will be editing your photo remake using photoshop on Tuesday and starting our presentations on Wednesday this week!
Use 2 of your own photos you have shot. Take one photo and erase the background, leaving the focal point. Cut and paste it on to the second photo combining the two. Upload it to your Photoshop Post and publish it before you leave today.
Below are a few sources to help you:
Then, upload the 2 original images and the the final combined image to your Fun with Photoshop blog and PUBLISH today.
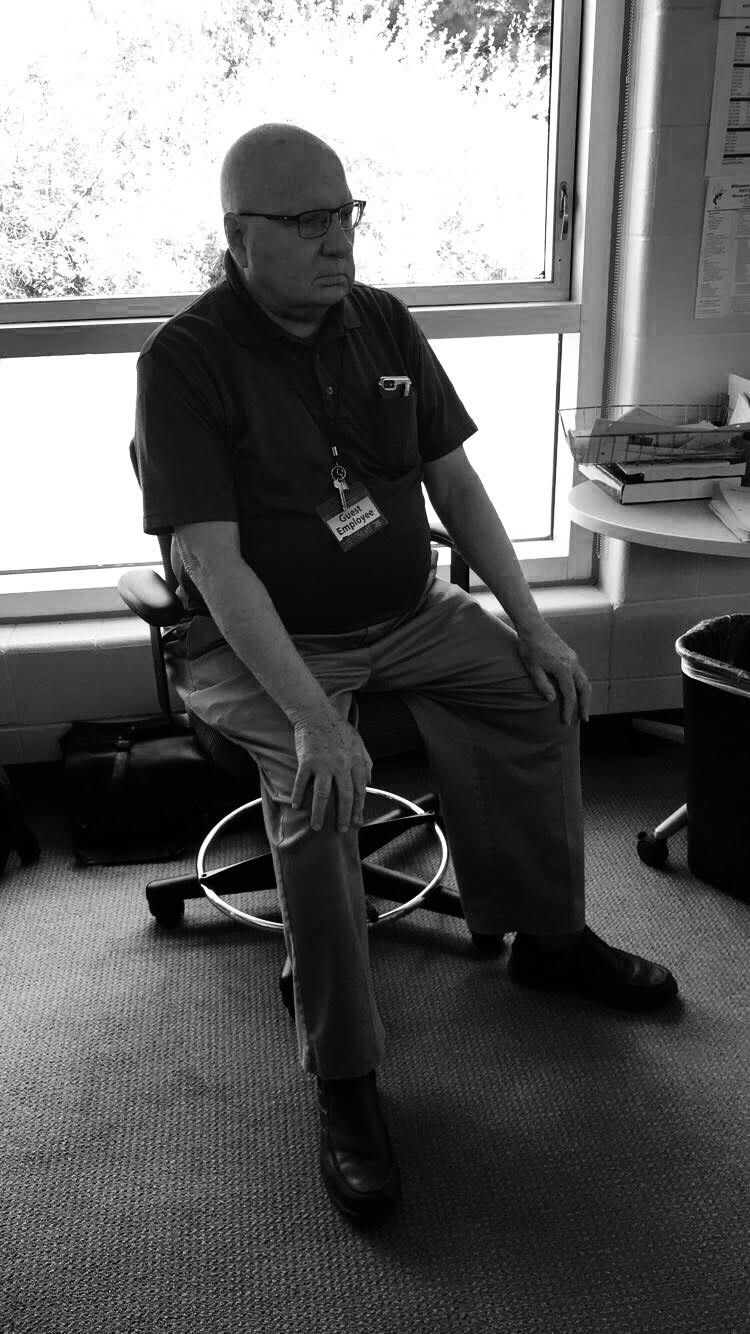
may 10 portraiture final
*Reminder: Shoot your photo remake! We will be editing your photo remake using photoshop on Tuesday and starting our presentations on Wednesday next week!
Review with your partner the poses and backgrounds where you will be shooting today. I want to hear you directing your partner on how and where they should pose during our shoot today.
*Remember to FIND THE LIGHT! You can use white paper as a reflector to help push light on the face.
*Remember 3 amazing portraits: a head shot, a waist up shot and a full figure shot.
Angle of the shot is important-try to get eye to eye or a little above a figure.
Play around with depth of field-try shallow and deep to see what you like.
Leading lines and framing will help guide the viewer's eye (my eye) to your figure's face.
We'll go to the library and outside (weather permitting). Feel free to shoot in the hallway and dome as we go.
Upon our return, edit your photos by cropping, making them black/white, adding filters, etc.
Open your portraiture post and upload your best photo for head shot, best photo for waist up and best photo for full figure. ***Publish your post today.
MAY 9 portraiture CONTINUED
*Reminder: Shoot your photo remake!
Research Posing via the links below. You can also google more information if you want to. Tomorrow, we are going to pair up and capture 3 amazing portraits of your partner: a head shot, a waist up shot, and a full figure shot. Think about who your partner will be and figure out which poses you'd like to try with them. You are going to be directing them. Also, think about your back ground. Will you be outside? Against a brick wall? Against lockers? etc...Plan today for your success tomorrow!
Research Posing via the links below. You can also google more information if you want to. Tomorrow, we are going to pair up and capture 3 amazing portraits of your partner: a head shot, a waist up shot, and a full figure shot. Think about who your partner will be and figure out which poses you'd like to try with them. You are going to be directing them. Also, think about your back ground. Will you be outside? Against a brick wall? Against lockers? etc...Plan today for your success tomorrow!
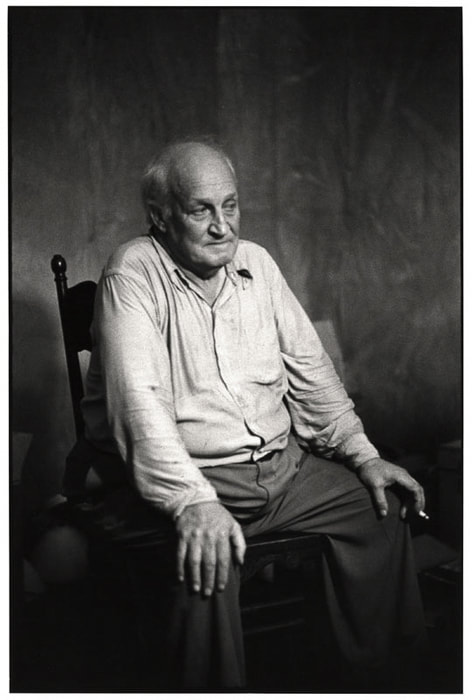
MAY 7 PORTRAITURE
*Reminder: Shoot your photo remake!
1. Create a new post and title it Portraiture.
2. Define Portraiture.
3. Define Posed photography.
4. Define Candid photography.
6. Upload an image of a successful portrait.
7. Copy, paste and answer the following:
Is the photo posed or candid and how can you tell?
What is the person wearing?
Is he/she sitting, standing, laying, etc? On what/where?
What is in the background?
Was shallow or deep depth of field used?
What kind of lighting was used (back lighting/silhouette, spotlight/hard light, sunlight/natural light, etc.)?
What other photography techniques did the photographer embrace to make this shot successful (contrast, framing, alternative angles, rule of thirds, etc)?
8. Create a plan for your portraiture photo by copying, pasting and answering the following:
Who will be your subject?
Will the photo be posed or candid?
What kind of clothing will the person be wearing?
Will he/she be sitting, standing, laying, etc? On what/where?
What will be in the background?
Will shallow or deep depth of field be used?
What other photography techniques will you embrace to make this shot successful (contrast, framing, alternative angles, rule of thirds, etc)?
9. Be ready to learn more from our guest speaker Will from The Studio Shop on Wednesday! Check out the 2 links below:
May 6 Fun with Photoshop DAY 4: Background
*Reminder: Shoot your photo remake in the next week. Then, you will finish you slide show and present it. Be sure your photo remake is as close to the original as possible! Consider, focal point, background, lighting, color, etc. You are welcome to shoot the photo and edit it for greater similarity.
Today, we are going to use the same photo you have been using all week. We're going to erase the background of your photo. There are many ways to do this. Let's practice and see what works best for you!
Click below for the PowerPoint on how to erase backgrounds.
Save as a PSD if you do not finish today. Save as a JPEG and upload it to your Photoshop post. Label it background.
*Hint-You can use lasso tool to select what you want to keep. Then, use CTRL SHIFT i to invert the selection and then delete the background.
may 3 10 tips for perfect prom photos
may 3 fun with photoshop DAY 3: History tool
*Reminder: Shoot your photo remake in the next week. Then, you will finish you slide show and present it. Be sure your photo remake is as close to the original as possible! Consider, focal point, background, lighting, color, etc. You are welcome to shoot the photo and edit it for greater similarity.
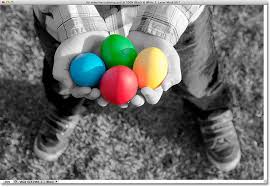
Today, we are going to make your same photo black and white again. Then, we're going to use the history tool to add color back into the photo. You decide where color will make the most sense.
Here's a video demonstrating what to do. And, you'll find some guidelines and hints below:
*Hint: Photoshop uses layers (right side of screen). Photoshop layers are like sheets of stacked acetate. You can see through transparent areas of a layer to the layers below. You move a layer to position the content on the layer, like sliding a sheet of acetate in a stack. You can also change the opacity of a layer to make content partially transparent.
The first layer is called background. But, you can change its name to the subject of your photo.
Create a new layer using CTRL J and label it black and white, in this case.
Make your photo black and white like we did yesterday by going to Image, Adjustments, Black and White.
Click on the History Brush (left side of screen). This tool reverts what you select back to the original state, in this case color.
At the top of the screen, select brush type. It's recommended that for this project, you use feather and low flow. A feathered brush is concentrated in the center, but gradually gets more transparent toward the edges. The flow is how much of the circle area is getting reverted back. Twenty percent or less is good for fine details.
It's also suggested that you use the lasso tool. Use this tool to select the area you are working in. It will keep your changes specific to this area. Again, this is helpful for fine details.
*Hint: To deselect a tool, use CTRL D.
*HInt: To zoom in, use CTRL ++ and to zoom out, use CTRL --.
If you do not finish today, remember to save your work as PSD. If you do finish, save your work as JPEG and upload it to your blog. Label it History Tool.
may 2 fun with photoshop day 2:
black and white/posterize
*Reminder: Shoot your photo remake in the next few weeks. Then, you will finish you slide show and present it. Be sure your photo remake is as close to the original as possible! Consider, focal point, background, lighting, color, etc. You are welcome to shoot the photo and edit it for greater similarity.
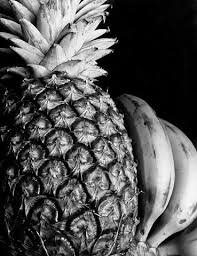
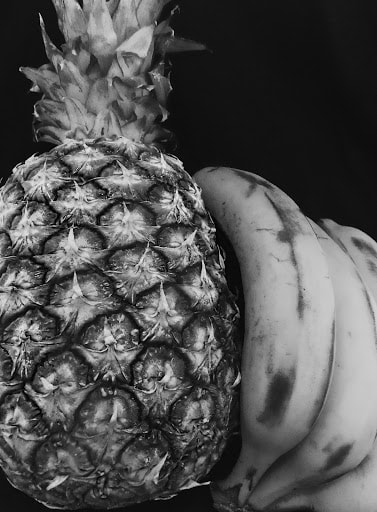
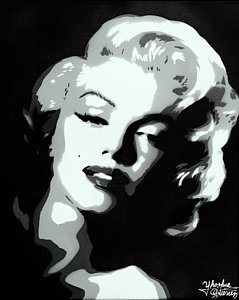
Today, we are going to learn how to Posterize a photo. To posterize means to print or display (a photograph or other image) using only a small number of different tones. Quite often this is done with portraits. But, you can use other subject matter too.
*Use the same photo you used for our first day of practice.
**Hint: Alt Ctrl Z will undo what you just did if you don't like it.
1) Open Adobe Photoshop CS3 .
2) Choose “File” > “New”
3) Title is your last name and Photoshop Posterize. Change to 8 x 10 inches.
4) Change the “Resolution” to 300 pixels/inch
5) Select “OK”
6) Choose “File” > “Place”
7) Press the “Enter” key on your keyboard
8) Choose “Edit” > “Transform” > “Scale” and then change the size of your image to fit the canvas (in order to not distort the image, hold down the “Shift” key on your keyboard when changing the scale).
9) Press the “Enter” key on your keyboard
10) If you need to change the positioning of your image on the canvas, select the “Move Tool” (located in the Photoshop Toolbox. To find the “Move Tool” hover over each icon to find the appropriate tool) and drag to the appropriate place.
11) Choose Mode and change photo to Grayscale. Click OK to discard color information.
12) Click Image again, go to Adjustments, and scroll to Brightness and Contrast. Change the Brightness and Contrast by moving the arrow to the right. Usually, the brighter and more contrast, the better. Click OK.
13) Choose Image again, scroll to Adjustments and scroll down to Posterize. Change level to a 2 or 3. You want a solid black/white image. If there is gray, you can undo and go back and add more brightness or contrast so that more areas will appear black/white when you posterize.
14) Once you have finished making revisions choose “File” > “Save As”
15) Appropriately change the “File Name” and change the “Save as type” to “JPEG”
16) Press “Save”
17) Upload this image to your Fun with Photoshop post and label it Posterize.
*If you do not finish your project but need to save it, use PSD instead of JPEG! PSD will allow you to open it and continue working on it.
may 1 fun with photoshop Day 1: Open/scale/save
*Reminder: Shoot your photo remake in the next few weeks. Then, you will finish you slide show and present it. Be sure your photo remake is as close to the original as possible! Consider, focal point, background, lighting, color, etc. You are welcome to shoot the photo and edit it for greater similarity.
Today, we begin our Photoshop Unit. We will take some time to practice the basics in class. Then, it will be on you to watch tutorials to get the specific effects you need for your assignment. During this unit, you need to use ONLY photos you have shot. For our first practice today, use a photo with a main focal point and not a lot of other detail/information in the background or surrounding area. We'll be manipulating this photo for the next few days. So, put some thought in to which photo you choose.
Opening, Scaling, and Saving Your Photo:
1) Open Adobe Photoshop CS3 .
2) Choose “File” > “New”
3) Title is your last name and Photoshop Practice. Change the “Width” to 8 inches and the “Height” to 10 inches
4) Change the “Resolution” to 300 pixels/inch
5) Select “OK”
6) Choose “File” > “Place”
7) Press the “Enter” key on your keyboard
8) Choose “Edit” > “Transform” > “Scale” and then change the size of your image to fit the canvas (in order to not distort the image, hold down the “Shift” key on your keyboard when changing the scale).
9) Press the “Enter” key on your keyboard
10) If you need to change the positioning of your image on the canvas, select the “Move Tool” (located in the Photoshop Toolbox. To find the “Move Tool” hover over each icon to find the appropriate tool) and drag to the appropriate place.
11) Once you have finished making revisions choose “File” > “Save As”
12) Appropriately change the “File Name” and change the “Save as type” to “JPEG”
13) Press “Save”
14) Create a new post titled Fun with Photoshop and upload your image. Publish your post.
april 26 famous photographer research & photo remake


1. Your goal for this assignment is to search for a famous photographer with whom you can relate or in which you have a piqued interest (whether it be their life circumstances or the subjects of their photos). Then, you will be remaking one of his/her famous photos.
Here are some famous photographers to research:
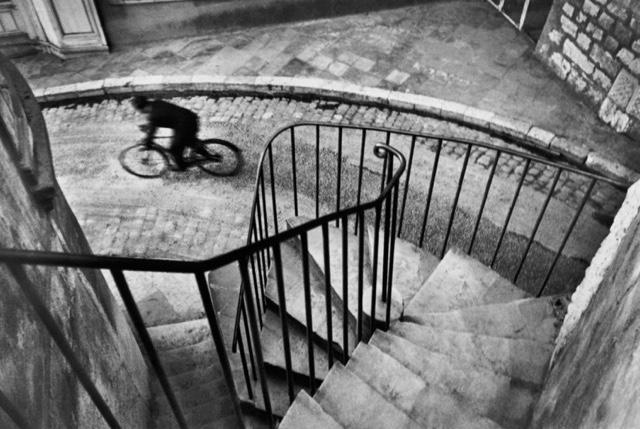
Henri Cartier-Bresson
Dorothea Lange
Jerry Uelsmann
Annie Leibovitz
Anne Geddes
George Hurrell
Steve McCurry
Imogen Cunningham
Cindy Sherman
Ansel Adams
But, don't stop there. Feel free to search Google for more.
2. Start a new post. Title it Famous Photographer Research and Photo Remake.
3. Upload the famous photo you are going to remake. State which photographer you are researching and the date and title of the photograph. Publish your post.
4. Use PowerPoint or Google Slides. Research your chosen photographer and his/her photos. Collect the following information for your presentation:
-a slide about your photographer's life
-a slide about type of camera used/use of technology/techniques used
-a slide about subjects/focal points of his/her photographs (when, where, what, why, who, how, etc.)
-a slide with the photo you are going to remake (include date/title)
-a slide about why you chose this photographer (how you relate to his/her life, what piques your interest in his/her photography, why you selected this particular photo to remake, etc.)
PHOTO REMAKE CRITERIA: Find one of your chosen photographer's photos that you are going to remake. This photo needs to be doable/reasonable enough for you to remake it as closely as possible (and of course school appropriate). If it's black and white, your photo needs to be black and white. If it's a close up of a tiger, you need to find a tiger to photograph! If a lady is wearing clothing from the 1950s and is laying on a sofa, reading a book, your photo needs to have a lady, wearing similar clothing, laying on a sofa, reading a book! The photo remake is an OUTSIDE OF CLASS assignment. The remake photo will be due in a few weeks. More information on that soon to come.
Here are some famous photographers to research:
Henri Cartier-Bresson
Dorothea Lange
Jerry Uelsmann
Annie Leibovitz
Anne Geddes
George Hurrell
Steve McCurry
Imogen Cunningham
Cindy Sherman
Ansel Adams
But, don't stop there. Feel free to search Google for more.
2. Start a new post. Title it Famous Photographer Research and Photo Remake.
3. Upload the famous photo you are going to remake. State which photographer you are researching and the date and title of the photograph. Publish your post.
4. Use PowerPoint or Google Slides. Research your chosen photographer and his/her photos. Collect the following information for your presentation:
-a slide about your photographer's life
-a slide about type of camera used/use of technology/techniques used
-a slide about subjects/focal points of his/her photographs (when, where, what, why, who, how, etc.)
-a slide with the photo you are going to remake (include date/title)
-a slide about why you chose this photographer (how you relate to his/her life, what piques your interest in his/her photography, why you selected this particular photo to remake, etc.)
PHOTO REMAKE CRITERIA: Find one of your chosen photographer's photos that you are going to remake. This photo needs to be doable/reasonable enough for you to remake it as closely as possible (and of course school appropriate). If it's black and white, your photo needs to be black and white. If it's a close up of a tiger, you need to find a tiger to photograph! If a lady is wearing clothing from the 1950s and is laying on a sofa, reading a book, your photo needs to have a lady, wearing similar clothing, laying on a sofa, reading a book! The photo remake is an OUTSIDE OF CLASS assignment. The remake photo will be due in a few weeks. More information on that soon to come.

april 25 choose one...
1. Create a new post and title it Choose One...
2. Click on the link and choose one activity to do. Follow the directions.
3. Take pictures of the activity as you go. You can use your camera or screen shot (ctrl + Print Scrn). Use the snipping tool if needed. Upload at least 3.
4. Reflection:
-Explain what activity you chose and why you chose it.
-What was one of the challenges you overcame?
-What was your favorite part?
-What do you think about what you did/made?
5. Publish your post. Look at the public view of your post to make sure I can see all your hard work!
april 24 reflections and warped images continued
1. Open your post and edit it. Upload your very best 5 reflected/warped photos. Crop out unnecessary detail. Use filters to improve the images as needed.
2. Copy, paste and answer the following for each of your 5 images:
What/who is your focal point?
What did you use to to warp or reflect it?
Use terms we've learned in class and proper grammar and punctuation.
3. Publish your post before you leave today.
2. Copy, paste and answer the following for each of your 5 images:
What/who is your focal point?
What did you use to to warp or reflect it?
Use terms we've learned in class and proper grammar and punctuation.
3. Publish your post before you leave today.
APRIL 22 reflections and warped images
1. Start a new post and title it Reflections and Warped Images.
2. Research photographs online which used reflections and/or warped images. Upload your favorite image to your blog.
3. Create a list of 10 items that were used in the photos you researched to reflect/warp the image (mirrors, water in a glass, spoon, etc).
4. With this assignment, you can be viewed in your own photograph. But you still have to be the photographer.
5. What is your plan for creating your reflected/warped photograph? What will be your focal point and what will you use to warp or reflect it? (I have a magnifying glass, a magnifying plastic sheet, mirrors and glass jars you may borrow. Tomorrow, we'll be in D9 shooting these photos.)
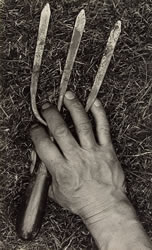
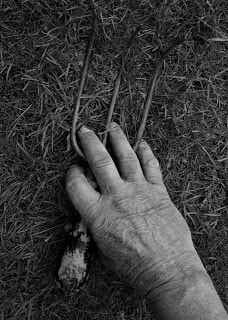
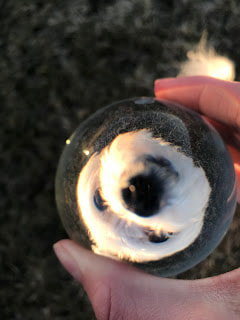
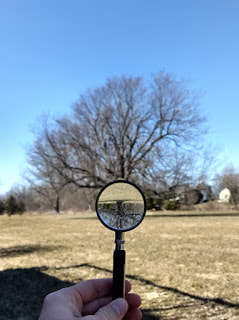
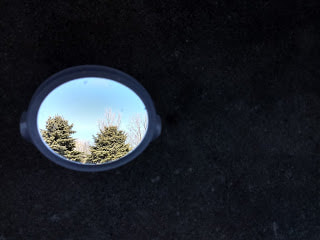
Below you'll see photos by Josh Glynn and Zachary Jewison. Notice how each used something to warp or reflect their focal point. Josh shot his photos through binoculars and a glass ball. Zachary used a magnifying glass and a mirror.
2. Research photographs online which used reflections and/or warped images. Upload your favorite image to your blog.
3. Create a list of 10 items that were used in the photos you researched to reflect/warp the image (mirrors, water in a glass, spoon, etc).
4. With this assignment, you can be viewed in your own photograph. But you still have to be the photographer.
5. What is your plan for creating your reflected/warped photograph? What will be your focal point and what will you use to warp or reflect it? (I have a magnifying glass, a magnifying plastic sheet, mirrors and glass jars you may borrow. Tomorrow, we'll be in D9 shooting these photos.)
Below you'll see photos by Josh Glynn and Zachary Jewison. Notice how each used something to warp or reflect their focal point. Josh shot his photos through binoculars and a glass ball. Zachary used a magnifying glass and a mirror.

april 19 top photographer
april 18 catch up day!
*Late or Missing Panorama, City/Landscape, Action Photography and Macro Photography posts will be accepted through class on Friday. No later. Please, notify me in class or via email when you update these. Thanks!
Selfies:
Finish your Selfie project and turn it in. Make sure your name is on the back. Place it in the folder.
Selfies:
Finish your Selfie project and turn it in. Make sure your name is on the back. Place it in the folder.
april 17 macro continued
1. Use your knowledge from your research yesterday about Macro Photography and the props you brought to take Macro Photos.
2. Take as many photos as you can trying out different lighting, different backgrounds, different props, etc.
3. Try your best to get the most focused photo possible! This is imperative for your success for this assignment! Experiment! Discover! And have fun!
4. When you finish, upload your very best macro photo to your Macro Photography blog post from yesterday.
5. Explain how your photo is a great example of macro photography based on the following criteria:
-subject size
-background
-focus
-depth of field
-lighting
6. Publish your post before you leave.
*Late or Missing Panorama, City/Landscape and Action Photography posts will be accepted through class on Friday. No later. Please, notify me in class or via email when you update these. Thanks!
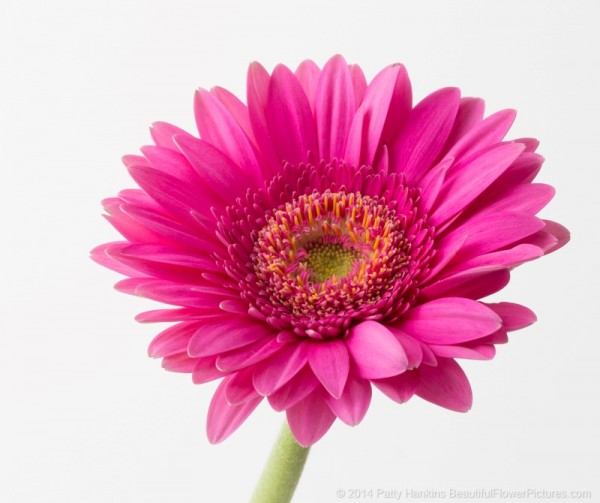
april 16 macro photography
1. Title this new post Macro Photography
Read the articles:
Macro Photography for Beginners Part 1
Macro Photography for Beginners Part 2
Here's How to Take Fantastic Macro Shots on Your iPhone
2. Using the articles as a source, define Macro Photography in your own words.
3. Using the articles , list 3 things to keep in mind when shooting macro photography.
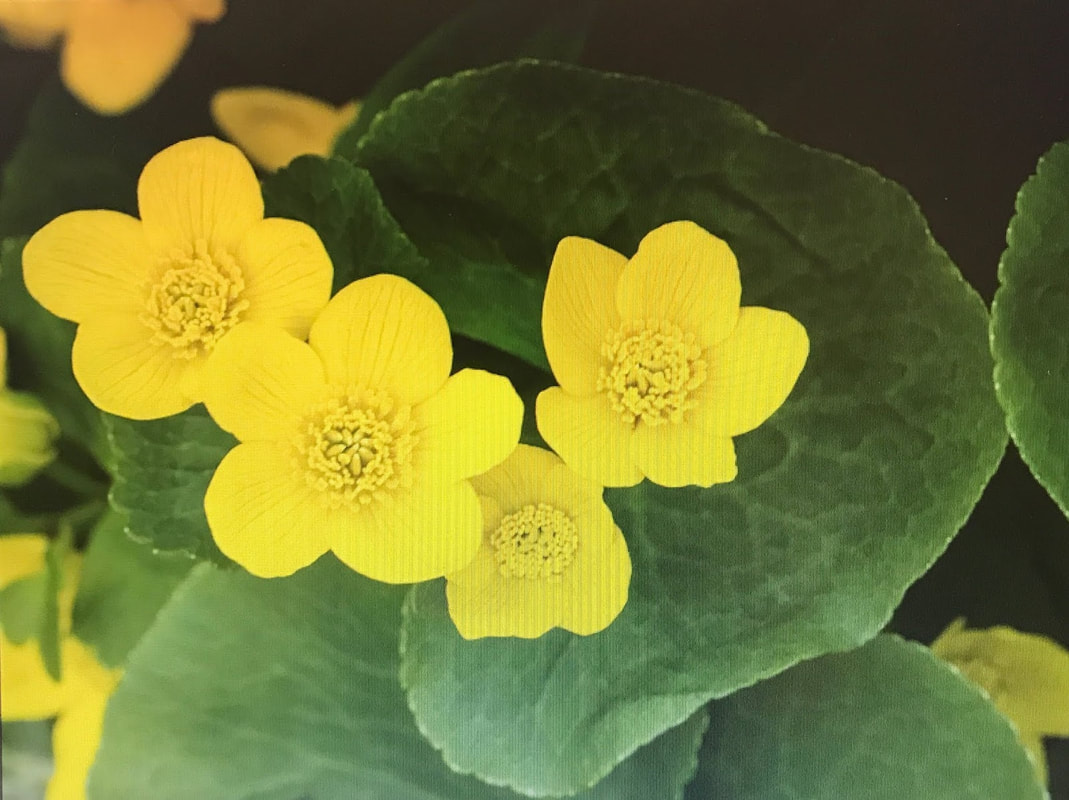
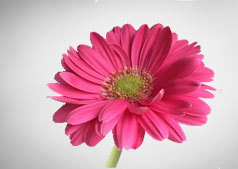
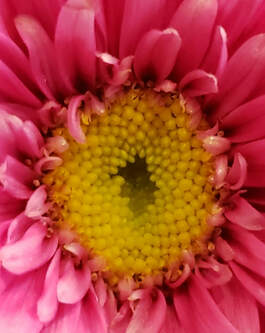
4. Insects and flowers are often used. List 10 other subjects you want to explore using macro photography.
5. Upload one image of macro photography from the internet.
6. Explain why each of the following make it a good example of macro photography:
-subject size
-background
-focus
-depth of field
-lighting
*Be ready to shoot your macro photos Wednesday. Bring a prop (think small!) and, if you have a macro specialty lens, bring it.
Read the articles:
Macro Photography for Beginners Part 1
Macro Photography for Beginners Part 2
Here's How to Take Fantastic Macro Shots on Your iPhone
2. Using the articles as a source, define Macro Photography in your own words.
3. Using the articles , list 3 things to keep in mind when shooting macro photography.
4. Insects and flowers are often used. List 10 other subjects you want to explore using macro photography.
5. Upload one image of macro photography from the internet.
6. Explain why each of the following make it a good example of macro photography:
-subject size
-background
-focus
-depth of field
-lighting
*Be ready to shoot your macro photos Wednesday. Bring a prop (think small!) and, if you have a macro specialty lens, bring it.
april 12 Finish action post
1. Class discussion of hints/tips when taking action photos.
2. Today we will meet with Mrs. Banister's class in order to shoot our action photos. Your goal is to apply what you have learned from your action photography research and to shoot as many photos as possible, insuring you get one amazing shot!
.........
3. Upload your best action photo from today in your action photo blog post.
4. Copy and paste and answer the following prompts in your blog:
One of the strengths in my action photo was....
One of the challenges for my action photo was...
In the future, I would overcome the above challenge by ...
5. Publish your post before you leave.
***Don't leave class without having your full page Selfie printed. We'll be using it to continue our project in D9, the Art Room, on Monday.
april 11 finish action research and begin selfie


Today, finish your action photography research so you have a good plan for our photo shoot with Mrs. Banister's gym class tomorrow.
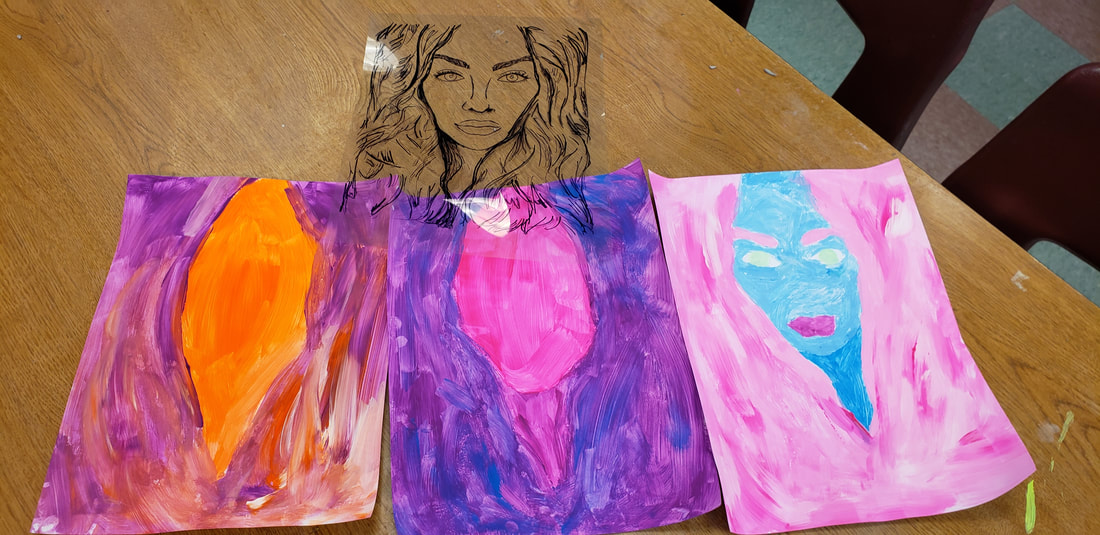
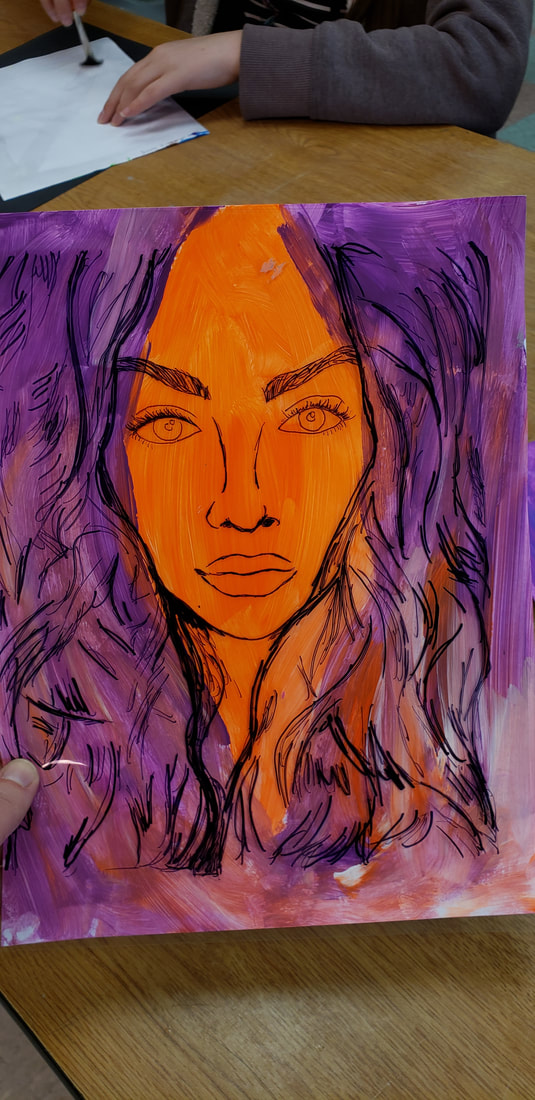
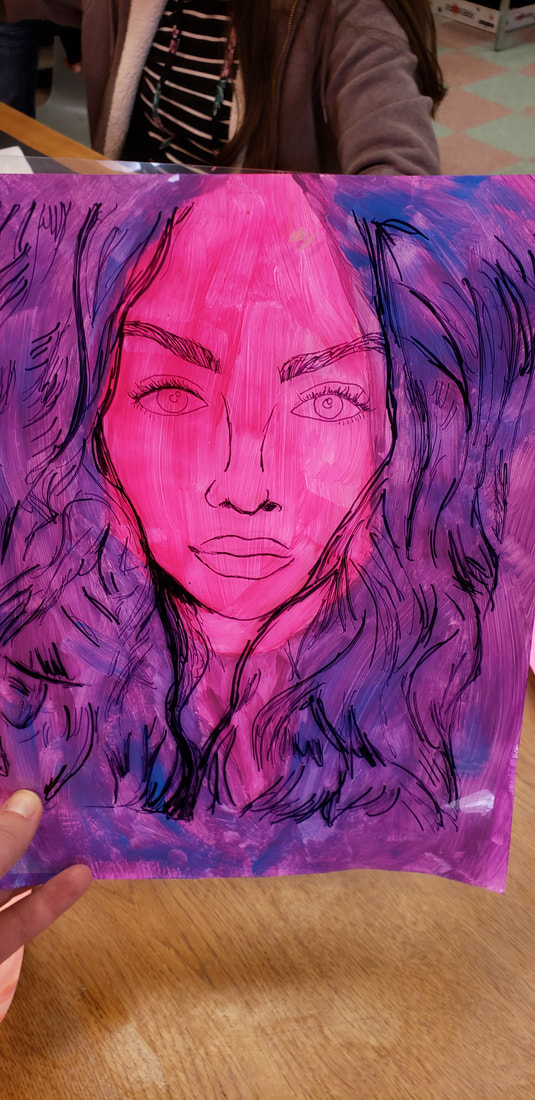
Then, begin your Selfie. Start by selecting a selfie that focuses on your head/neck/shoulders. The background shouldn't take up a lot of the photo, so crop it as needed.
Next, print your selfie so it takes up a full page of paper on the D6 printer.
Show Mrs. Kubu your paper to get it okayed and to get your transparency and your sharpie.
Finally, line up your paper underneath your transparency and begin to trace the lines you see (the outline of your body, your eyes, nose, mouth, ears, hair, clothing, etc.). Get the basics traced, then go back and trace the little details.
Remove the paper and double check the image on the transparency to see if you missed anything.
We'll paint the background next week!
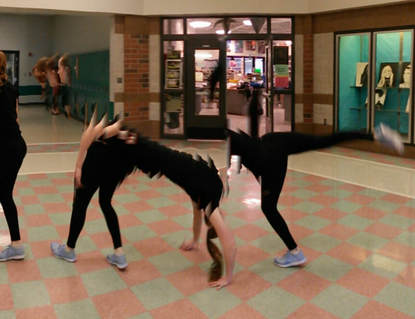
april 10 action photography
1. Class discussion of article: A Times Photographer's Journey Home to the Winter Olympics.
-His obsession with capturing the perfect moment at the Olympics at times rivals the obsession of the athletes themselves.
-Planning and patience may be the foundation, but once the event begins, instinct takes over. There is a purely meditative aspect to being a great sports photographer and a feeling of being solely in the moment. Anticipation is critical for capturing the moments that happen so fast.
-“It’s really being able to see what’s going to happen before it happens,” Mr. Lee said. “If you wait until you see it with your own eyes, many times it’s too late.”
2. Start a new post and title it Action Photography.
3. Choose one of Chang W. Lee's Winter Olympics photos from the article and save and upload it to your blog.
4. Copy, paste and answer the following in your blog:
Does the action photo show faces/emotion?
Does it show the ball/equipment being used?
Does it show people moving or do they just look like they are standing around?
Does it have good lighting?
Is it cropped to help focus on the subject in motion?
Is it focused or is it very blurry? (For this project, some blur can be ok! Especially the if it's the object in motion!)
Was the panning technique used?
5. Make a list of 5 things to keep in mind when shooting action photos by researching online. Copy and paste the website where you got your information or use a hyperlink.
Ex. Panning (moving camera with the subject during the exposure so the subject is in focus but the background is blurry) https://www.nikonusa.com/en/learn-and-explore/a/tips-and-techniques/10-tips-for-better-camera-panning.html
1.
2.
3.
4.
5.
*Reminder: Find a selfie you want to work with for your upcoming project. Email it to yourself and print it FULL PAGE black and white on the D6 printer.
***We will be working with a selfie soon. Start looking through your photos for a shot you are happy with (mainly face/shoulders, little or no background).
april 8 landscape/cityscape continued
Many of you are missing your Playing with Panorama post. Please, let me know when you update it so I can grade it.
1. Open your Landscape & Cityscape post from before spring break and edit it.
2. Upload your very best Landscape photo. Then, copy, paste and answer the following questions:
Where did you go to capture this photo?
What was your focal point?
What time of day?
From what angle?
What was the weather?
Did you use panoramic mode? Why or why not?
Where/How did you utilize leading lines/rule of thirds/blue hour/golden hour/etc?
3. Next, upload your very best Cityscape photo. Then, copy, paste and answer the following questions:
Where did you go to capture this photo?
What was your focal point?
What time of day?
From what angle?
What was the weather?
Did you use panoramic mode? Why or why not?
Where/How did you utilize leading lines/rule of thirds/blue hour/golden hour/etc?
4. Publish your post by end of class.
march 28 panorama continued
You are going to shoot 3 types of panoramic shots today.
You get to choose a partner. Your partner will shoot photos of you and you will shoot photos of him/her.
You may choose from this Article which features 7 Panoramic Photo Ideas. Or you may choose to research panoramic photo ideas on your own.
Here is a video on Cloning for your use as well.
1. When you are finished shooting your 3 different types of panoramic shots with your partner, upload them to your Playing with Panorama post.
2. For each photo, explain which type it is and what you did to capture the shot. Explain any challenges you encountered and how you overcame them. Explain which was your favorite and why. Use terms we have learned in class. Use proper grammar and punctuation.
This assignment is due end of class Thursday.
Reminder: Your final Landscape/Cityscape photos will be due Monday April 8. Any late or missing work must be submitted no later than Friday, March 29th and you must notify me via email.
March 27 Playing with panorama
1. Finish your Landscape & Cityscape Post from yesterday and publish it.
2. Start a new post and title it Playing with Panorama.
3. A Panorama is any wide-angle view or representation of a physical space.
4. Research panorama and list 5 helpful hints when shooting panoramic photos.
5. Research how to shoot a panorama using your device. List helpful steps and/or put a link to a helpful website in your post.
6. Check your camera for Panoramic Mode/Pano Mode under your camera settings. If you do not have this mode, you need to work with a partner who does. You may choose to play around with panorama individually or with a partner.
7. Shoot panoramic photos for practice in our room or in the dome outside our classroom door.
8. Be ready to shoot more photos using this technique tomorrow. You may want to bring a jacket in case the weather allows for us to go outside. No props necessary.
Reminder: Your final Landscape/Cityscape photos will be due Monday April 8.
***Reminder: All late or missing assignments will be accepted no later than Friday, March 29th You need to tell me or email me when you update an assignment.
march 25-26 landscape and cityscape photography
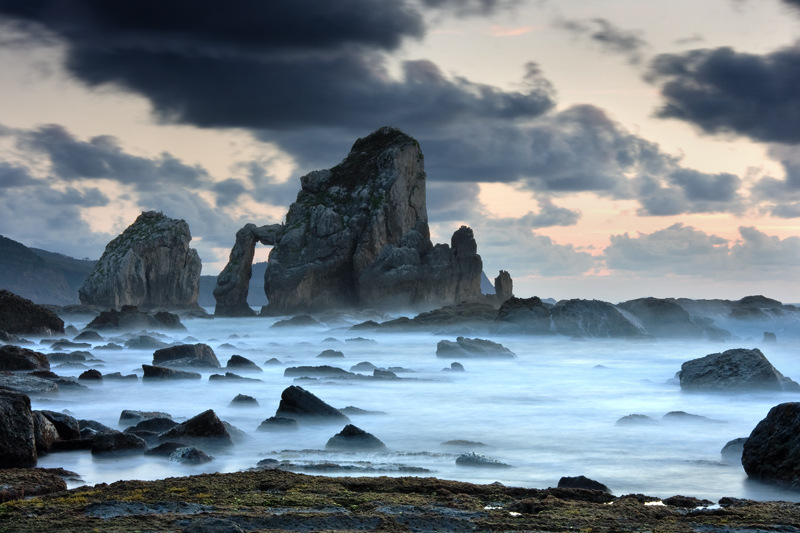
1. Start a new post and title it Landscape and Cityscape Photography.
2. Copy, paste and answer the following questions:
What is the difference between Landscape and Cityscape photography?
What is panorama/panoramic photography?
What is the Golden Hour?
What is the Blue Hour?
2. Research Landscape Photography. List 5 helpful hints when shooting landscape photography. Include your source.
3. Upload a landscape photo. Explain why you chose it and what you think the photographer did to get the image. Describe time of day/night, angle of shot, weather, panoramic mode, leading lines, focal point, rule of thirds, etc.
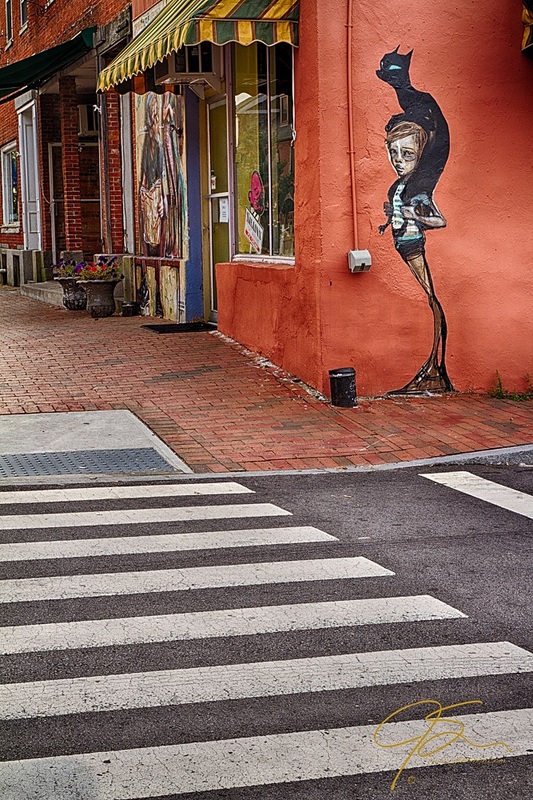
4. Research Cityscape Photography. List 5 helpful hints when shooting cityscape photography. Include your source.
5. Upload a cityscape photo. Explain why you chose it and what you think the photographer did to get the image. Describe time of day/night, angle of shot, weather, panoramic mode, leading lines, focal point, rule of thirds, etc.
6. Just to clarify:
Landscape does not mean your backyard. Think: VAST
Cityscape does not mean a million person metropolis. Think: MANMADE
For both, your photograph needs to have a focal point. It shouldn't be a flat corn field. It needs to have a foreground, middle ground and background. Use the following to help you write your plan for Landscape/Cityscape Photography. Copy, paste and answer the following questions:
LANDSCAPE
Where are you going to go?
What will be your focal point?
What time of day?
From what angle?
What would be your choice of weather?
Are you going to use panoramic mode? Why or why not?
Where/How could you utilize leading lines/rule of thirds/blue hour/golden hour/etc?
CITYSCAPE
Where are you going to go?
What will be your focal point?
What time of day?
From what angle?
What would be your choice of weather?
Are you going to use panoramic mode? Why or why not?
Where/How could you utilize leading lines/rule of thirds/blue hour/golden hour/etc?
This is an outside of class assignment. Your final Landscape/Cityscape photos will be due Monday April 8.
2. Copy, paste and answer the following questions:
What is the difference between Landscape and Cityscape photography?
What is panorama/panoramic photography?
What is the Golden Hour?
What is the Blue Hour?
2. Research Landscape Photography. List 5 helpful hints when shooting landscape photography. Include your source.
3. Upload a landscape photo. Explain why you chose it and what you think the photographer did to get the image. Describe time of day/night, angle of shot, weather, panoramic mode, leading lines, focal point, rule of thirds, etc.
4. Research Cityscape Photography. List 5 helpful hints when shooting cityscape photography. Include your source.
5. Upload a cityscape photo. Explain why you chose it and what you think the photographer did to get the image. Describe time of day/night, angle of shot, weather, panoramic mode, leading lines, focal point, rule of thirds, etc.
6. Just to clarify:
Landscape does not mean your backyard. Think: VAST
Cityscape does not mean a million person metropolis. Think: MANMADE
For both, your photograph needs to have a focal point. It shouldn't be a flat corn field. It needs to have a foreground, middle ground and background. Use the following to help you write your plan for Landscape/Cityscape Photography. Copy, paste and answer the following questions:
LANDSCAPE
Where are you going to go?
What will be your focal point?
What time of day?
From what angle?
What would be your choice of weather?
Are you going to use panoramic mode? Why or why not?
Where/How could you utilize leading lines/rule of thirds/blue hour/golden hour/etc?
CITYSCAPE
Where are you going to go?
What will be your focal point?
What time of day?
From what angle?
What would be your choice of weather?
Are you going to use panoramic mode? Why or why not?
Where/How could you utilize leading lines/rule of thirds/blue hour/golden hour/etc?
This is an outside of class assignment. Your final Landscape/Cityscape photos will be due Monday April 8.
*All missing/late work is due end of class Friday 3/29/19
You must notify me of updates either in class or via email
march 22 finalized what if...?
1. Open your What if...? post.
2. Upload each of your 10 What if...? photos and match them up with your 10 scenarios.
3. Reflect on this assignment. Comment on your photos regarding each of the following:
This was my favorite What if...? photo because....
This was my least favorite What if...? photo because...
This was the most fun photo to shoot because...
This was the most challenging photo to shoot because...
4. Publish your post before you leave. Double check that it appears correctly on your blog so I can grade it.
march 21
catch up day: So Far..due today, What if? due Friday
march 20 abstract photography continued
Reminder: Your What if..? photos will be due on Friday 3/22. Make sure you have experimented, been creative, found solutions if something wasn't working out, were fearless but not reckless. Try 10 new things and don't forget to use the composition skills you have learned!
1. Choose your favorite abstract photo from the oil/water experiment and your milk/food coloring experiment from yesterday. Edit it as needed to make it a strong composition. Upload it to your Abstract Photography post.
2. Title your abstract photos. Be creative (and school appropriate).
3. Reflect on your abstract photos, one taken within our classroom Monday and two from our experiments Tuesday. Copy, paste and answer the following questions in your blog:
Which is your favorite photo and why?
What are some of our photography techniques we've learned that you used to capture the abstract photo?
What makes the composition strong?
Is abstract photography something you might pursue in the future?
4. Publish your post before you leave class today.
***If you finish the above assignment, you need to move on to the following. So Far....
1. Create a new post called So far...
2. Look through your blog at all of the photos YOU have taken for this class.
3. Choose and upload one of YOUR photos for each of the following and explain why you chose it:
Copy, paste and answer these prompts:
So far...this is my favorite photo because...
So far...this is my least favorite photo because...
So far...this was my most challenging photo because...
4. Now, check out other blogs from your class and from the other photography class. Choose your favorite photo that a FELLOW STUDENT shot.
Leave a comment on his/her blog saying that you are using it for the So far...assignment.
Copy, paste and answer:
So far...this is my favorite photo shot by ____________ because....
So Far... is due by the end of class Thursday! I will be using it as a talking point with your parents at parent/teacher conferences on Thursday. So make sure you publish it and double check that it appears correctly before you leave.
march 18 abstract photography
Reminder: Your What if..? photos will be due on Friday 3/22. Make sure you have experimented, been creative, found solutions if something wasn't working out, were fearless but not reckless. Try 10 new things and don't forget to use the composition skills you have learned!
1. Class discussion: Abstract photography, sometimes called non-objective, experimental, conceptual or concrete photography, is a means of depicting a visual image that does not have an immediate association with the object world and that has been created through the use of photographic equipment, processes or materials. An abstract photograph may isolate a fragment of a natural scene in order to remove its inherent context from the viewer, it may be purposely staged to create a seemingly unreal appearance from real objects, or it may involve the use of color, light, shadow, texture, shape and/or form to convey a feeling, sensation or impression.
2. Start a new post and title it Abstract Photography.
3. Research abstract photographers. Choose an abstract photo taken by one of the abstract photographers. Upload the photo and say who shot the photo and the title of it.
4. Explain what makes this photo abstract. (Use the definition of abstract photography from above to help you answer this.)
5. Explain how you think the photographer captured the shot.
6. Explain why you chose this photo.
7. Research Abstract Photography Tips (try this website). List 5 helpful hints when shooting abstract photographs.
8. Your goal is to take one abstract photograph without leaving this room. Make the viewer (me) guess where/how you took the shot. Then, upload it to your Abstract Photography post.
9. Research these 2 experiments. You will be conducting them tomorrow in D9. So, make sure you know what you are doing!
Oil and Water Abstract Photos:
Milk and Food Coloring Abstract Photos:
MARCH 15 wHAT IF...?
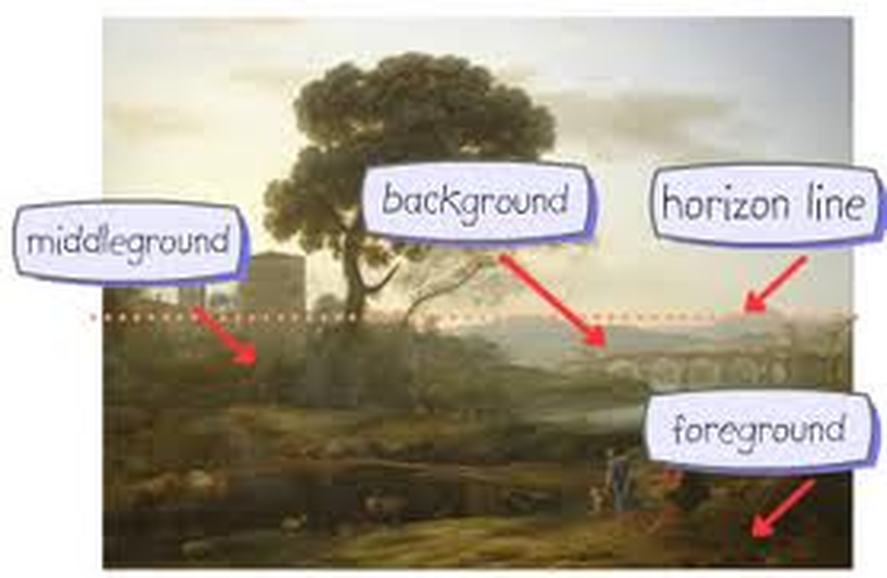
Let's complete our Foreground/Middle Ground/Background project.
1. Title a new post Foreground/Middle Ground/Background.
2. Take a picture of your project. Make sure it is good quality (crop the edges, no glossy shine obstructing the details, etc.). Upload your photo to your new post.
3. Copy and paste the following into your post and complete the blanks:
You will see in my background...
You will see in my middle ground...
You will see in my foreground...
The most challenging part of this assignment was....and I overcame it by....
The strongest area of my project is...because...
Publish your post before you leave today.
THEN....
1. Title a new post: What if...?
2. Your goal is to experiment and make discoveries during this assignment. Be creative with your ideas. They need to be plausible/doable. Be fearless. Don't hold back. Just don't be reckless. Copy, paste and complete the following prompts:
List 10 scenarios:
Ex: What if...I shoot photos using a flash in a completely dark room?
1. What if...
2. What if...
3. What if...
4. What if...
5. What if...
6. What if...
7. What if...
8. What if...
9. What if...
10. What if...
Keep in mind the Principles of Composition and techniques you have used in class so far (shadow/light, alternative angles, depth of field, framing, rule of thirds, leading lines). Don't forget to test different camera modes. And, make sure you have fun doing it!
This assignment will be due toward the end of next week. It is an outside of class assignment.
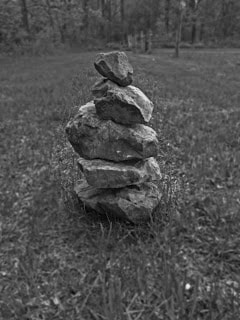
march 12 foreground, middle ground, background
Definitions:
Foreground is the part of a view that is nearest to the observer, especially in a picture or photograph.
Middle ground the middle distance of a painting or photograph.
Background the area or scenery behind the main object of contemplation, especially when perceived as a framework for it.
Application:
You will choose to work individually or in a group of 2.
1. Get a piece of cardboard and write your name(s) on the back of it.
2. Use magazine images to create an environment incorporating things in the foreground, middle ground and background. Be mindful of the size of each image to make sure it looks believably close, far away, even further away.
3. Cut the images out carefully. You'll have access to scissors and x-acto knives, glue sticks, rubber cement and Elmer's glue. Use foam core and tabs to "prop up" the images and attach them to the box environment. I have fishing line for use in hanging images. Don't be afraid to "go outside of" the rectangle.

march 11 catch up day
Due to many absences, we will use today as a catch up day. You need to submit your Alphabet with Quote and your Leading Lines assignments before you leave today. Let me know what you update so I can grade it. Tomorrow we will be moving on to new material. Don't fall behind! Use your class time wisely!
march 7/8 leading lines continued
1. We will go shoot photos using leading lines.
2. Upload your very best photo using leading lines in your Leading Lines post from yesterday. Please, crop, edit, add filters, etc to have the very best photographic composition.
3. Copy and paste the following questions into your blog and answer them:
What did you do to shoot your photo?
What did you use as your leading lines to draw the viewers attention to a focal point?
Who is your focal point?
Is your composition symmetrically balanced? What does this do to the composition?
4. Be sure to use proper grammar and punctuation. Publish your post before leaving today and double check to make sure you can view it on your blog!
march 7 5th hr only-college for creative
studies visit
This is an opportunity to find out more about options after high school. CCS is an amazing place to study and hone your art skills before entering the working world.
Because of this visit, we'll have a catch up day Friday. Then, be ready to shoot your leading lines photos on Monday. We'll be taking a tour of the building as a class and looking for leading lines.
Because of this visit, we'll have a catch up day Friday. Then, be ready to shoot your leading lines photos on Monday. We'll be taking a tour of the building as a class and looking for leading lines.
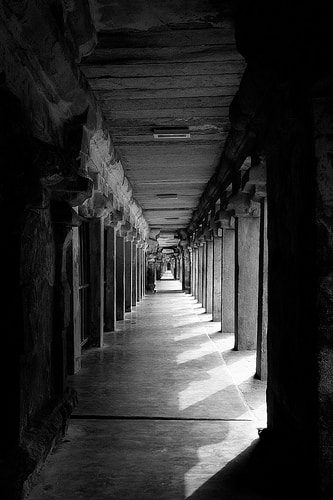
march 6 leading lines
1. Start a new blog post and title it Leading Lines.
2. Research Leading Lines and IN YOUR OWN WORDS define the technique.
3. Explain why a photographer would use Leading Lines in a composition.
4. IN YOUR OWN WORDS define symmetry.
5. Explain how Leading Lines and Symmetry can be used together to create a strong composition.
6. Find an image that uses Leading Lines and upload it to your blog.
7. Describe what the photographer used to create the Leading Lines in the composition. Is the composition symmetrical?
8. Publish your post.
*Be ready to shoot photos using Leading Lines tomorrow.
alphabet photography quote project
If you finish early today, start researching a quote about art or photography. *It must be school appropriate. Make sure you find out who said/wrote/sang the quote.
You will be using your alphabet photos to spell out the quote on either a word doc or google doc. Whichever you prefer. The quote should take up majority of the doc. You may want to change orientation of the doc from portrait to landscape. At the bottom, type the name of the person who said/wrote/sang the quote. Use a font that goes well with the quote. You may need to enlarge or bold the name to make it stand out.
This assignment will be due end of class tomorrow 3/5/19. You will need to email/share your doc with me to get these points.
march 4 rule of thirds continued
1. Decide which 3 photos are your strongest based on the Rule of Thirds. Edit as needed. Upload them to your blog post Rule of Thirds.
3. Explain what your focal point is in each of the 3 photos. How did you use Rule of Thirds regarding placement of the focal point? Where does the viewer's eye travel after the focal point?
Publish your post before you leave today!
3. Explain what your focal point is in each of the 3 photos. How did you use Rule of Thirds regarding placement of the focal point? Where does the viewer's eye travel after the focal point?
Publish your post before you leave today!
march 1 publish photo alphabet and catch up day
Make sure you are all caught up before you leave today.
Notify me of any updates you made to your posts from absences or incompletes.
Publish your Photography Alphabet in ALPHABETICAL ORDER! It's due by the end of class today!
Shoot your Rule of Thirds photo for homework or find an old photo you shot that works. Be ready to upload it on Monday.
Notify me of any updates you made to your posts from absences or incompletes.
Publish your Photography Alphabet in ALPHABETICAL ORDER! It's due by the end of class today!
Shoot your Rule of Thirds photo for homework or find an old photo you shot that works. Be ready to upload it on Monday.
feb 28 rule of thirds
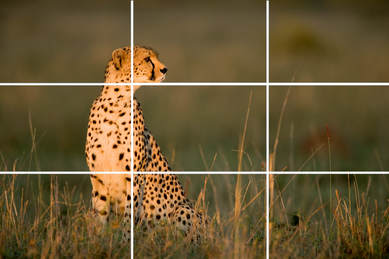
1. Start a new post and title it Rule of Thirds.
2. Watch the following videos:
https://www.youtube.com/watch?v=IpEuYp4_iSg
https://www.youtube.com/watch?v=A7wnhDKyBuM
3. In your blog, explain the Rule of Thirds. Use your own words! Explain why it is important, what tools you can use, what effect it has on your composition, etc.
4. Find 1 image that utilizes the Rule of Thirds and upload it to your blog.
5. Explain how the photographer used the Rule of Thirds regarding placement of the focal point to the grid lines.
6. Also, explain where your eye travels after it lands on the focal point.
7. Publish your post.
8. On your camera, go to settings and find "Guidelines" to access the Rule of Thirds grid. Apply it. If you can't find it, continue on to #8.
8. Get a transparency from me. Measure your camera screen. Cut your transparency to your camera screen dimensions. Measure and draw your Rule of Thirds lines on the transparency. Tape your transparency to your screen.
*This photo shoot will be homework. I don't want to see any photos shot in or around this building. Be ready to upload your photos to your blog on Monday 3/4/19.
All Late/incomplete/missing work
due end of class friday 3/1/19.
*Be sure to notify me of any updates to your blog so i can grade them. Thanks!
due friday march 1 photography alphabet
1. We are going to capture images of the alphabet-all 26 letters-using things from our D6 lab, at home, etc.
2. You may use letters from signs, you may use letters from hand gestures, you may make letters from objects, etc. Be creative!
3. None of the subjects you shoot photos of can be repeated. Each letter must be made up of something different, something new.
4. As you shoot the photos, think of lighting, angles and cropping.
5. The letters need to be easily recognizable as such.
6. Use the list of the alphabet I gave you or print a new one from below. Check off the letters as you go.
7. Start a new post and title it Photography Alphabet.
8. Upload your cropped letters IN ALPHABETICAL ORDER!
*Be sure to publish this post! It is due end of class Friday 3/1/19.
feb 27 framing finishing
1. Continue your Framing post.
2. Select your strongest photo that uses framing and upload it.
3. Write a paragraph reflecting on the photo by describing how you shot it, if you edited it and how the element you used as a frame enhances the composition.
4. Publish your post before you leave. It is due at the end of class.
2. Select your strongest photo that uses framing and upload it.
3. Write a paragraph reflecting on the photo by describing how you shot it, if you edited it and how the element you used as a frame enhances the composition.
4. Publish your post before you leave. It is due at the end of class.
feb 26 Framing continued
1. Review your framing assignment from yesterday.
2. Today will be your opportunity to shoot photos using the framing technique. Hopefully, you brought a prop. If not, you need to pair up and be a subject for your partner's photo. We'll go on a tour of the D hallway and the Library and you'll need to get as many framing shots as possible. Stay with the group! How your class does on this school photography tour will decide the future of our out-of-classroom photo shoots.
3. Edit your photos so they are the best they can be!
4. Be ready to upload and reflect on your framing photos tomorrow.
*Extra time? Work on photographing your alphabet letters, cropping them and transferring them to the computer for near future use.
feb 25 framing
Framing in photography refers to:
Today, you will research framing in photography.
1. Start a new post and title it Framing.
2. Find 1 image of framing from the internet and upload it to your blog.
3. Describe how the photographer used a "frame" in the image. What does the frame add to the composition?
4. Research more images and make a list of 25 areas/items/etc. that photographers used to frame their photos. Make sure your list is numbered by copying and pasting the numbers below:
List of items photographers used to frame photos:
1.
2.
3.
4.
5.
6.
7.
8.
9.
10.
11.
12.
13.
14.
15.
16.
17.
18.
19.
20.
21.
22.
23.
24.
25.
5. Start to think about what you can use to frame a photograph taken somewhere around the school. Tomorrow, we'll be working individually/with a partner/group to take "framed" photos. Have a prop ready to photograph or be ready to be a prop and have your photograph taken.
*Also, tomorrow will be the last day I accept any Alternative Angles assignments. Please, notify me either in class or via email that you have updated it and published it so I can grade it. Thanks!
*Finished early? Continue the Alphabet Letter Photograph Cropping assignment below. We'll be using them soon! Be ready!
- adding a foreground object into your scene that frames, or helps highlight your subject
- sometimes involve stepping back from your original composition and looking for elements to use as a frame
- the frame is there to set the scene, and draw the viewer into the image
Today, you will research framing in photography.
1. Start a new post and title it Framing.
2. Find 1 image of framing from the internet and upload it to your blog.
3. Describe how the photographer used a "frame" in the image. What does the frame add to the composition?
4. Research more images and make a list of 25 areas/items/etc. that photographers used to frame their photos. Make sure your list is numbered by copying and pasting the numbers below:
List of items photographers used to frame photos:
1.
2.
3.
4.
5.
6.
7.
8.
9.
10.
11.
12.
13.
14.
15.
16.
17.
18.
19.
20.
21.
22.
23.
24.
25.
5. Start to think about what you can use to frame a photograph taken somewhere around the school. Tomorrow, we'll be working individually/with a partner/group to take "framed" photos. Have a prop ready to photograph or be ready to be a prop and have your photograph taken.
*Also, tomorrow will be the last day I accept any Alternative Angles assignments. Please, notify me either in class or via email that you have updated it and published it so I can grade it. Thanks!
*Finished early? Continue the Alphabet Letter Photograph Cropping assignment below. We'll be using them soon! Be ready!

finished early?...
start shooting photos of letters of the alphabet.
consider shape, color, variety. look all around you!
Then, crop your photos so just the letter is showing.
transfer your 26 images to your computer so we can create our first project! Photo letter collage
feb 22 depth of field continued
1. Continue your Depth of Field post you started by editing it.
2. Yesterday, you shot two photos. One needed to successfully use shallow depth of field and the other needed to successfully use deep depth of field. (See below.) You were to use the prop you brought and the same background in both photos. Just change the depth of field.
3. Insert your best 2 photos of DOF into your blog.
4. Label each photo appropriately with either shallow or deep DOF.
5. Write a paragraph explaining which of the two photos you prefer and why. Explain what you did to capture the two types of DOF (background, lighting, camera modes/aperture, etc). Explain how this technique might come in handy when taking photos in the future.
Publish your post before leaving class today. It is due at the end of the hour!
feb 20 depth of field
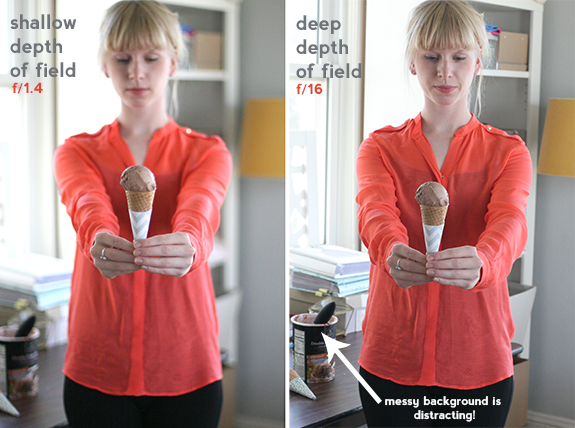
1. Create a new post in your blog and title it Depth of Field.
2. Research the following and post what you find in your blog. Be sure to site your sources!
-What is Depth of Field?
-What is aperture and what does it have to do with Depth of Field?
-What is shallow Depth of Field? Are there other acceptable terms than 'shallow'?
-What is deep Depth of Field? Are there other acceptable terms than 'deep'?
-What can you do with your camera to create shallow or deep DOF? *Hint-it's different for digital cameras and smartphones. If you're not sure how yours works, google it!
3. Select 1 image of shallow depth of field and 1 image of deep depth of field from the internet and post them on your blog.
4. Label them Shallow DOF and Deep DOF.
5. Be ready to shoot photos of Shallow and Deep DOF on Thursday. YOU NEED TO BRING A PROP. Small toys are fun to photograph, stuffed animals, keys, makeup, etc. You will be working in a group of 2 or 3. We'll have fabric and lights to setup a background.
feb 19 Alternative angles continued
1. Edit your Alternative Angles post. Add your photos below the research you conducted last week.
2. Select your best 4 photos, one each of birds eye view, straight on, worms eye view and tilted. You may need to edit the photo by cropping or brightening, etc. Upload your photos to your post.
3. Label each photo with the angle.
4. Include a paragraph about your favorite of your 4 successful photos. Explain why it's your favorite. Explain how you shot the image, if you edited it, etc. What does the angle say about the image. Read into it like a psychiatrist.
Be sure to publish your post! Double check that it appears by viewing your blog! Due end of class today!
*Also, tomorrow will be the last day I accept any Shadow and Light assignments. Please, notify me either in class or via email that you have updated it and published it so I can grade it. Thanks!
feb 14 alternative angles
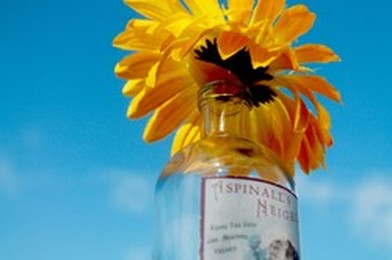
1. Create a new post and title it Alternative Angles.
2. Research: Post some facts that you researched in your blog. Be sure to site your sources (include the website from which you found the information.)
3. Find 4 images from the internet each using a different alternative angle.
-from above/birds eye view
-from below/worms eye view
-straight on/eye level
-tilted
4. Below each image, explain how you think the photographer created each unique angle.
5. Does this say anything about the image? Does it change how you, as the audience, view the image?
On Friday, be ready to shoot photographs from these angles. You need to bring a prop to class (toy, sunglasses, shoe, etc.)
feb 11 shadows and light continued
Important: Before we begin today...
I'd like to clarify that when we have photo shoots during class, you need to stay within certain areas. I noticed several of you wandering off and disappearing during our photo shoot. If this happens again, I'll have to limit you to this class room and/or assign photo shoots as homework instead of during class time. Let me know if I've been unclear.
1. Open your blog and edit your Shadow and Light post. (By editing it, you'll be adding to what's already there.)
2. Look at the photos you took using shadow and light. When considering which are the best images, think about the following things:
-Is there good contrast? (light vs dark)
-Is there a strong sense of light direction?
-Is it a unique subject? Is it interesting to an outside viewer?
-Is it clear, not blurry/pixelated?
-Is there a strong focal point, not a lot of other information in the photo?
If you can answer YES to each of the above, then you have a good shadow and light photo. If you answer no, you might be able to edit and/or crop your photo to achieve a good shadow and light photo. Some suggestions would be to change the contrast setting or maybe crop the photo to get rid of other distracting information. Let me know if you are wondering about other fixes to help create the best photo possible.
3. Insert your very best photo from the shoot yesterday into your blog below your research.
4. Include a paragraph explaining what you did as a photographer to get the shot (light position, angle, used a prop or hand gesture, what you used as a background, etc.). A paragraph for this class is considered 3-5 complete sentences, using proper grammar and spelling. Be sure you publish your post! Due end of class today!
5. If you finish early, you're welcome to view other student's blogs to see their Shadow and Light posts. If you choose to leave a comment on their blog, stay positive, uplifting and remember that these are public.
feb 5 shadows and light
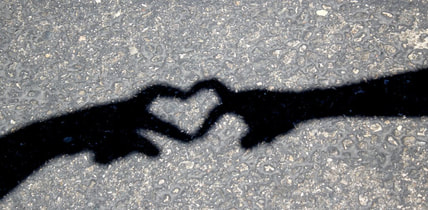
1. Title your new post: Shadows and Light
2. Research Shadows and Light and their use in photography. Some things to consider are:
-Is there good contrast? (light vs dark)
-Is there a strong sense of light direction?
-Is it a unique subject? Is it interesting to an outside viewer?
-Is it clear, not blurry/pixelated?
-Is there a strong focal point, not a lot of other information in the photo?
3. Post 2 images from the internet that represent the use of shadows and light. (Remember you can't just copy and paste images into your blog, you need to save them and insert them!)
4. Then, explain what you think the photographer did to create the images:
What light source was used?
What made the shadow?
What surface is the shadow on?
*Use complete sentences and proper grammar. Don't forget to re-read and spell check before you publish.
Tomorrow you will have a chance in class to create your own images using shadow and light. You will be randomly assigned a partner, but you each must create your own image! You may want to bring a prop to help you capture a great photograph. If you don't use a prop, think of a hand gesture, a figure's gesture, a shadow puppet, etc. that you can use. A phone with a flashlight would be helpful too. I'll provide some backgrounds for you to use if you'd like. If it's sunny, we can create images using the sun too.
feb 1 A brief history of photography
1. Title a new post: History of Photography.
2. Read the following article:
A Brief History of Photography and The Camera
3. In Your Own Words (not copied and pasted from another source), write one sentence each describing their importance:
COPY AND PASTE INTO YOUR BLOG:
The First Camera was important because...
The First Permanent Images (Daguerreotype, Emulsion Plates, Dry Plates) were important because...
Camera For Everyone was important because......
The Horrors of War were important because......
The Wonder of Instant Images was important because.....
Advanced Image Control was important because......
Introducing Smart Cameras was important because......
The Digital Age was important because......
4. Copy and paste the information below into your blog. Reflect on the history of photography and fill in each blank describing which one of the above sections in your opinion is the most significant in the evolution of the camera/photograph. Fill in the blanks explaining why. As always, use proper grammar and punctuation.
COPY AND PASTE INTO YOUR BLOG:
Though not everybody would agree, I want to argue that................................................................is the most significant step in the evolution of the camera.
I have several reasons for arguing this point of view:
My first reason is ...
A further reason is...
Furthermore...
Therefore, although some people might argue that....................................... I have shown that ....
Be sure to publish your post!!! This is due end of class Monday Feb 4th.
jan 25 create a blog and publish your first assignment
Part 1
1. Go to: blogger.com.
2. Click: create a blog
3. Follow the prompts and use your google email address.
4. Your blog title and address should be your first name and your last name each starting with a capital letter, no spaces. (ex: JohnSmith)
Part 2
1. Create your first post by clicking on New Post.
2. Title it: Elements and Principles of Design.
3. Upload your best photograph of your assigned element/principle. (You will need to download your image to the computer. You can use a variety of means like email the image to yourself and then download it from your email. Or, save your image on your google drive and access it from there. Or, if you have an SD card, I have a card reader you can borrow to upload your image from your camera to your computer.)
4. Use the handout to explain how it's a good example. The use of complete sentences, proper grammar and punctuation are expected.
5. Publish your post. (Don't just save it!)
6. Click on view blog to double check if your assignment posted. This is how I will be accessing your projects to grade them. So, make sure they are there!!!
jan 24 elements and principles of design
1. In class discusion of the elements and principles of design. See PowerPoint below.
2. Pair up. You'll be assigned an element or principle. Take many photos of examples of your assigned element or principle.
3. Choose your best example photo and be ready to explain why.
2. Pair up. You'll be assigned an element or principle. Take many photos of examples of your assigned element or principle.
3. Choose your best example photo and be ready to explain why.
It's a pleasure to have you in class. Some things you need to know are below. Please, read the syllabus thoroughly and let me know if you have any questions. Also, read and sign the art contract and take it home to be signed by a parent or guardian. It is due back Friday, January 25 for 10 points.
